
 Regina Wang
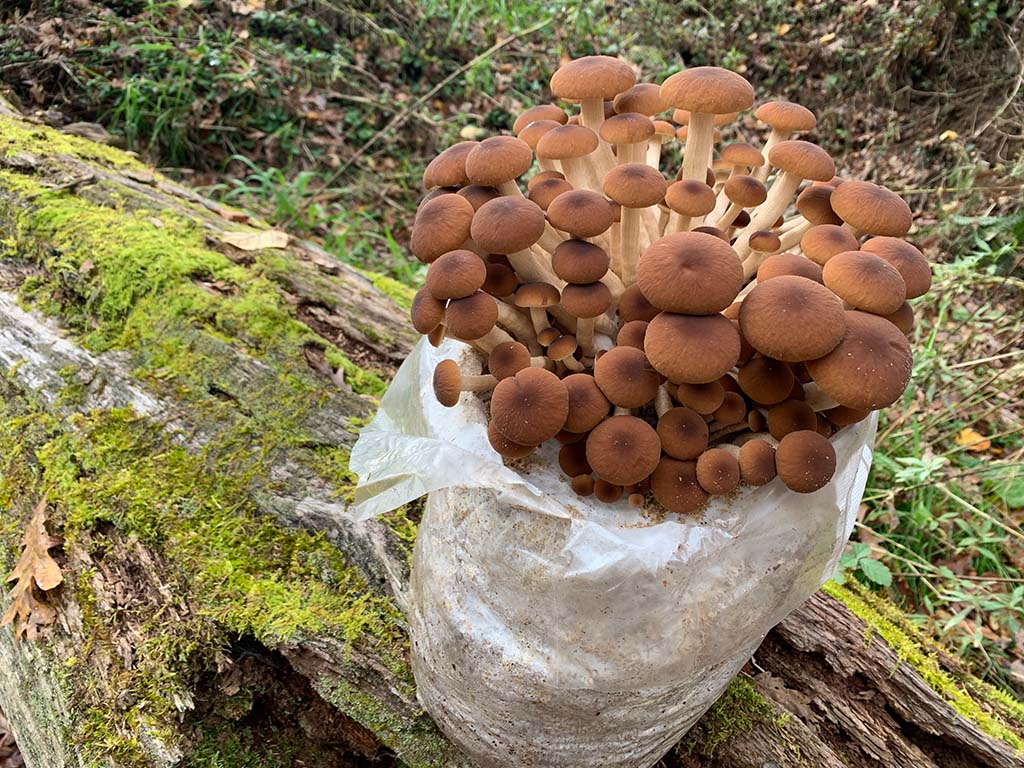
You know that feeling of buying a plastic-wrapped container of mushrooms from the grocery store? They’re… fine. But what if you could step into your own home and pluck fresh, earthy, incredibly flavorful mushrooms right from a log or a box? That’s the magic of home cultivation. It’s not some secret art for master gardeners. Honestly, it’s one of the most rewarding and surprisingly simple hobbies you can start.
Let’s dive in. We’re going to strip away the complexity and walk through the easiest, most effective ways to grow your own gourmet mushrooms. No fancy lab equipment or a degree in mycology required. Just a little patience and a willingness to get your hands a little dirty.
Why Bother Growing Your Own Mushrooms?
Well, beyond the sheer cool factor—and trust me, it never gets old—there are some solid reasons. For starters, the flavor is a universe away from store-bought. A homegrown Oyster mushroom has a rich, almost seafood-like aroma and a texture that holds up beautifully in a pan. You’re also in complete control. That means no pesticides, no weird shipping chemicals, just pure, organic fungus.
It’s also incredibly sustainable. You can grow pounds of food on a countertop using agricultural waste products like coffee grounds or straw. And on top of all that? It’s a genuinely fascinating process to watch. One day you have a block of what looks like white fuzz, and the next, tiny little pins are pushing their way into the world. It’s a small daily miracle.
Picking Your First Fungal Friend: Best Mushrooms for Beginners
You wouldn’t try to bake a soufflé on your first day in the kitchen, right? The same logic applies here. Some mushrooms are divas; others are resilient workhorses. For your first foray, stick with the easy ones.
Oyster Mushrooms (Pleurotus ostreatus)
The absolute champion for beginners. Oyster mushrooms are aggressive growers, meaning they colonize their substrate quickly and are less prone to contamination. They fruit prolifically and come in stunning varieties like blue, golden, and pink. They’re also not picky—they’ll grow on everything from coffee grounds to cardboard.
Shiitake Mushrooms (Lentinula edodes)
If you’re after that deep, umami, meaty flavor, shiitake is your go-to. They’re a bit slower than oysters and traditionally grown on hardwood logs or sawdust blocks. The wait is worth it for that classic, robust flavor that’s a staple in so many dishes.
Lion’s Mane (Hericium erinaceus)
This one is wild-looking—like a fluffy, white pom-pom. Its flavor is often compared to lobster or crab, making it a fantastic seafood substitute. Lion’s Mane is also renowned for its potential cognitive benefits. It’s a bit more sensitive to fresh air than oysters, but still very manageable for a attentive new grower.
Gearing Up: The Basic Supplies You’ll Actually Need
Here’s the deal: you can go down a rabbit hole of expensive equipment. But for your first grow? Keep it simple. You can get started with just a few key items.
- Growing Medium (Substrate): This is the food for your mushrooms. For beginners, pre-sterilized grow kits are the easiest. Alternatively, pasteurized straw, hardwood sawdust pellets, or even used coffee grounds work for some species.
- Mushroom Spawn: This is the equivalent of seeds. It’s typically grain (like rye or millet) that’s been fully colonized by the mushroom’s mycelium. You mix this into your substrate to kickstart the growth. For a first timer, buying spawn from a reputable supplier is the way to go.
- A Container or Growing Bag: A large, clear plastic tub with a lid (a monotub) is perfect for many setups. Alternatively, large autoclavable bags with a filter patch allow for gas exchange while keeping contaminants out.
- Spray Bottle: Mushrooms need high humidity to fruit. A simple spray bottle for misting is non-negotiable.
- Cleaning Supplies: Rubbing alcohol (70% isopropyl), gloves, and a face mask. Cleanliness is your number one weapon against mold and bacteria.
The Step-by-Step Process: From Inoculation to Harvest
1. Inoculation: Planting the “Seed”
This is where you introduce your spawn to the substrate. If you’re using a pre-sterilized bag of substrate, you just inject the spawn or mix it in a clean environment. The key here is cleanliness. Wipe everything down with alcohol, wear gloves, and work quickly to minimize the chance of airborne contaminants getting in.
2. Colonization: The Waiting Game
Once inoculated, your bag or tub needs to be kept in a warm, dark place (around 70-75°F or 21-24°C). This is the incubation period. Over the next 2-4 weeks, the white, thread-like mycelium will spread through the substrate, eating the nutrients. It will eventually turn into a solid, white block. Don’t open the container during this phase! You’re just letting the mycelium do its thing in peace.
3. Fruiting: Making Mushrooms
When the block is fully colonized (all white), it’s time to convince it to produce mushrooms. This requires a change in conditions. We call this “initiating pinning.” Move the block to a area with indirect light, lower the temperature slightly, and introduce fresh air. Most crucially, crank up the humidity. You’ll do this by misting the inside of your tub or bag several times a day. Tiny little bumps, called “pins,” will soon form. Those are your baby mushrooms.
4. Harvesting Your Reward
Those pins will double in size almost daily. Harvest your oysters when the caps are still slightly curled under but before they flatten out completely. For Shiitake, harvest when the cap is about 70% open. For Lion’s Mane, harvest while the “teeth” are still short, before they start to look long and stringy. Use a clean knife or twist gently at the base to harvest.
Troubleshooting Common Problems
Things don’t always go perfectly. And that’s okay. Here’s a quick guide to what might go wrong.
| Problem | What It Looks Like | Likely Cause & Fix |
| Green/Blue Mold | Powdery green or blue spots | Contamination. Sadly, it’s usually a lost cause. Isolate the block and toss it. Improve sterilization next time. |
| No Pins Forming | Fully colonized block, but no mushrooms | Not enough fresh air exchange or humidity. Fan the container more and mist regularly. |
| Long, Spindly Stems | Mushrooms with tiny caps and very long stems | They’re reaching for air! Too much CO2 buildup. They need more fresh air. |
| Dry or Cracked Caps | Mushrooms look wrinkled or cracked | Simple. Not enough humidity. Mist more frequently. |
The Joy of the Home Harvest
There’s a quiet satisfaction that comes from growing your own food. But with mushrooms, it feels different. It feels like you’ve been let in on a secret process of nature, one that usually happens hidden in the forest under dark and damp conditions. You’ve nurtured it, you’ve watched it, and finally, you get to taste it.
The first time you sauté a handful of oysters you grew yourself in a little butter and garlic… well, it’s a moment. You realize this isn’t just about saving a few dollars at the store. It’s about connection. It’s about understanding where your food comes from on a fundamental level and participating in that cycle. It’s a small, delicious rebellion against the ordinary.