
 Peter Steven
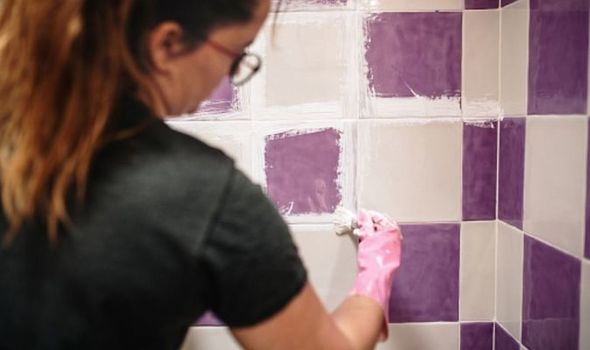
If your kitchen tile backsplashes have become outdated but do not pose any physical threats, painting them can be an economical alternative to replacement. Just follow a few easy steps and use products specifically tailored for tile surfaces.
As part of your efforts to prevent peeling paint, it is crucial that you apply multiple thin coats and allow each one to dry thoroughly between each application.
Preparation
Painting kitchen tiles is an easy project that can dramatically change the aesthetic of any room. To avoid cracking or flaking paint over time, be sure to select an anti-flake tile paint designed specifically for such surfaces and ensure it is applied appropriately.
Before painting tiles, they must first be thoroughly cleaned of grease, grime or mould. You should sand them to dull their gloss and prepare for painting; be sure to ventilate the area and wear breathing protection when sanding.
Once your tiles have fully dried, it is time to apply a bonding primer using a small foam roller and working thin layers for best results. A sealant may also be added to protect newly painted tiles from moisture that could eventually cause them to deteriorate over time.
Primer
At the core of tile painting lies using high-grade bonding primer, available from home improvement stores and available specifically to help adhere to hard surfaces like tiles.
Zinsser Bullseye 1-2-3, a water-based primer suitable for most materials, works great. Brush or roller application works equally well and typically only one coat is necessary to cover most surfaces. Furthermore, its low odor formula offers a range of neutral hues from light grey to Flintstone for easy customization of color schemes.
Mapei Eco-Prime Grip, which is a resin-based primer, may provide thicker coverage on more challenging surfaces. Though more costly, this option allows for maximum versatility.
As with any paint job, it is critical to follow the directions on the primer closely, including its curing times. Otherwise, your tile could lose adhesion and begin peeling prematurely. Just like with painting projects, be sure to cover nearby surfaces with plastic and drop cloths in case splatters occur during your painting job.
Paint
Replacing kitchen tiles with fresh new colors is one of the easiest and quickest ways to transform any space, yet the cost associated with tearing out existing splashbacks and installing an entirely new kitchen may be prohibitive. For an affordable alternative, why not paint over old tiles instead?
Tile paint comes in various shades ranging from neutral hues to vibrant brights, and should be applied using either brushing or rollering techniques. Two-part epoxy paint provides stronger finishes than single coat products.
Before beginning, lightly sand the tiles of your tiled area to create a ‘key’ which allows the paint to stick better to them. After cleaning them off completely, apply a thin primer layer – available from local DIY stores – which should dry before applying your chosen tile paint in thin layers; be sure to allow each application to fully dry between coats!
Finish
Painting tiles is a simple, cost-effective DIY project that can transform the look of your kitchen. However, to achieve optimal results it’s crucial to follow all steps correctly as any mistakes could cause chips or peeling to occur in the paint application process.
Before beginning the actual painting process, first scrub your tile surfaces thoroughly with sugar soap or detergent solution to eliminate grease and dust build-up, followed by wiping down and leaving to dry for 24 hours before wiping down and wiping dry.
Depending on the tile paint you select, sanding may be necessary before application. Sanding roughens up tile surfaces so primer and paint adhere more securely; some products do not necessitate this step so be sure to read labels thoroughly.
Apply tile paint in thin layers for best results and to avoid brush marks and prolong its durability. When you finish painting all surfaces of tile surfaces, seal them off to protect them from moisture and staining before sealing with one last sealant coat.